MS Word tutorial: thesis template UAlg
This is a guide to help you using MSWord to write a thesis (following a template for Universidade do Algarve).
template download here.
How to use the template
Once downloaded to you computer, you can open the template. It will automatically fill some fields of the document. So, the first thing to do is to setup these fields, and check that they are correct.
Setup the template
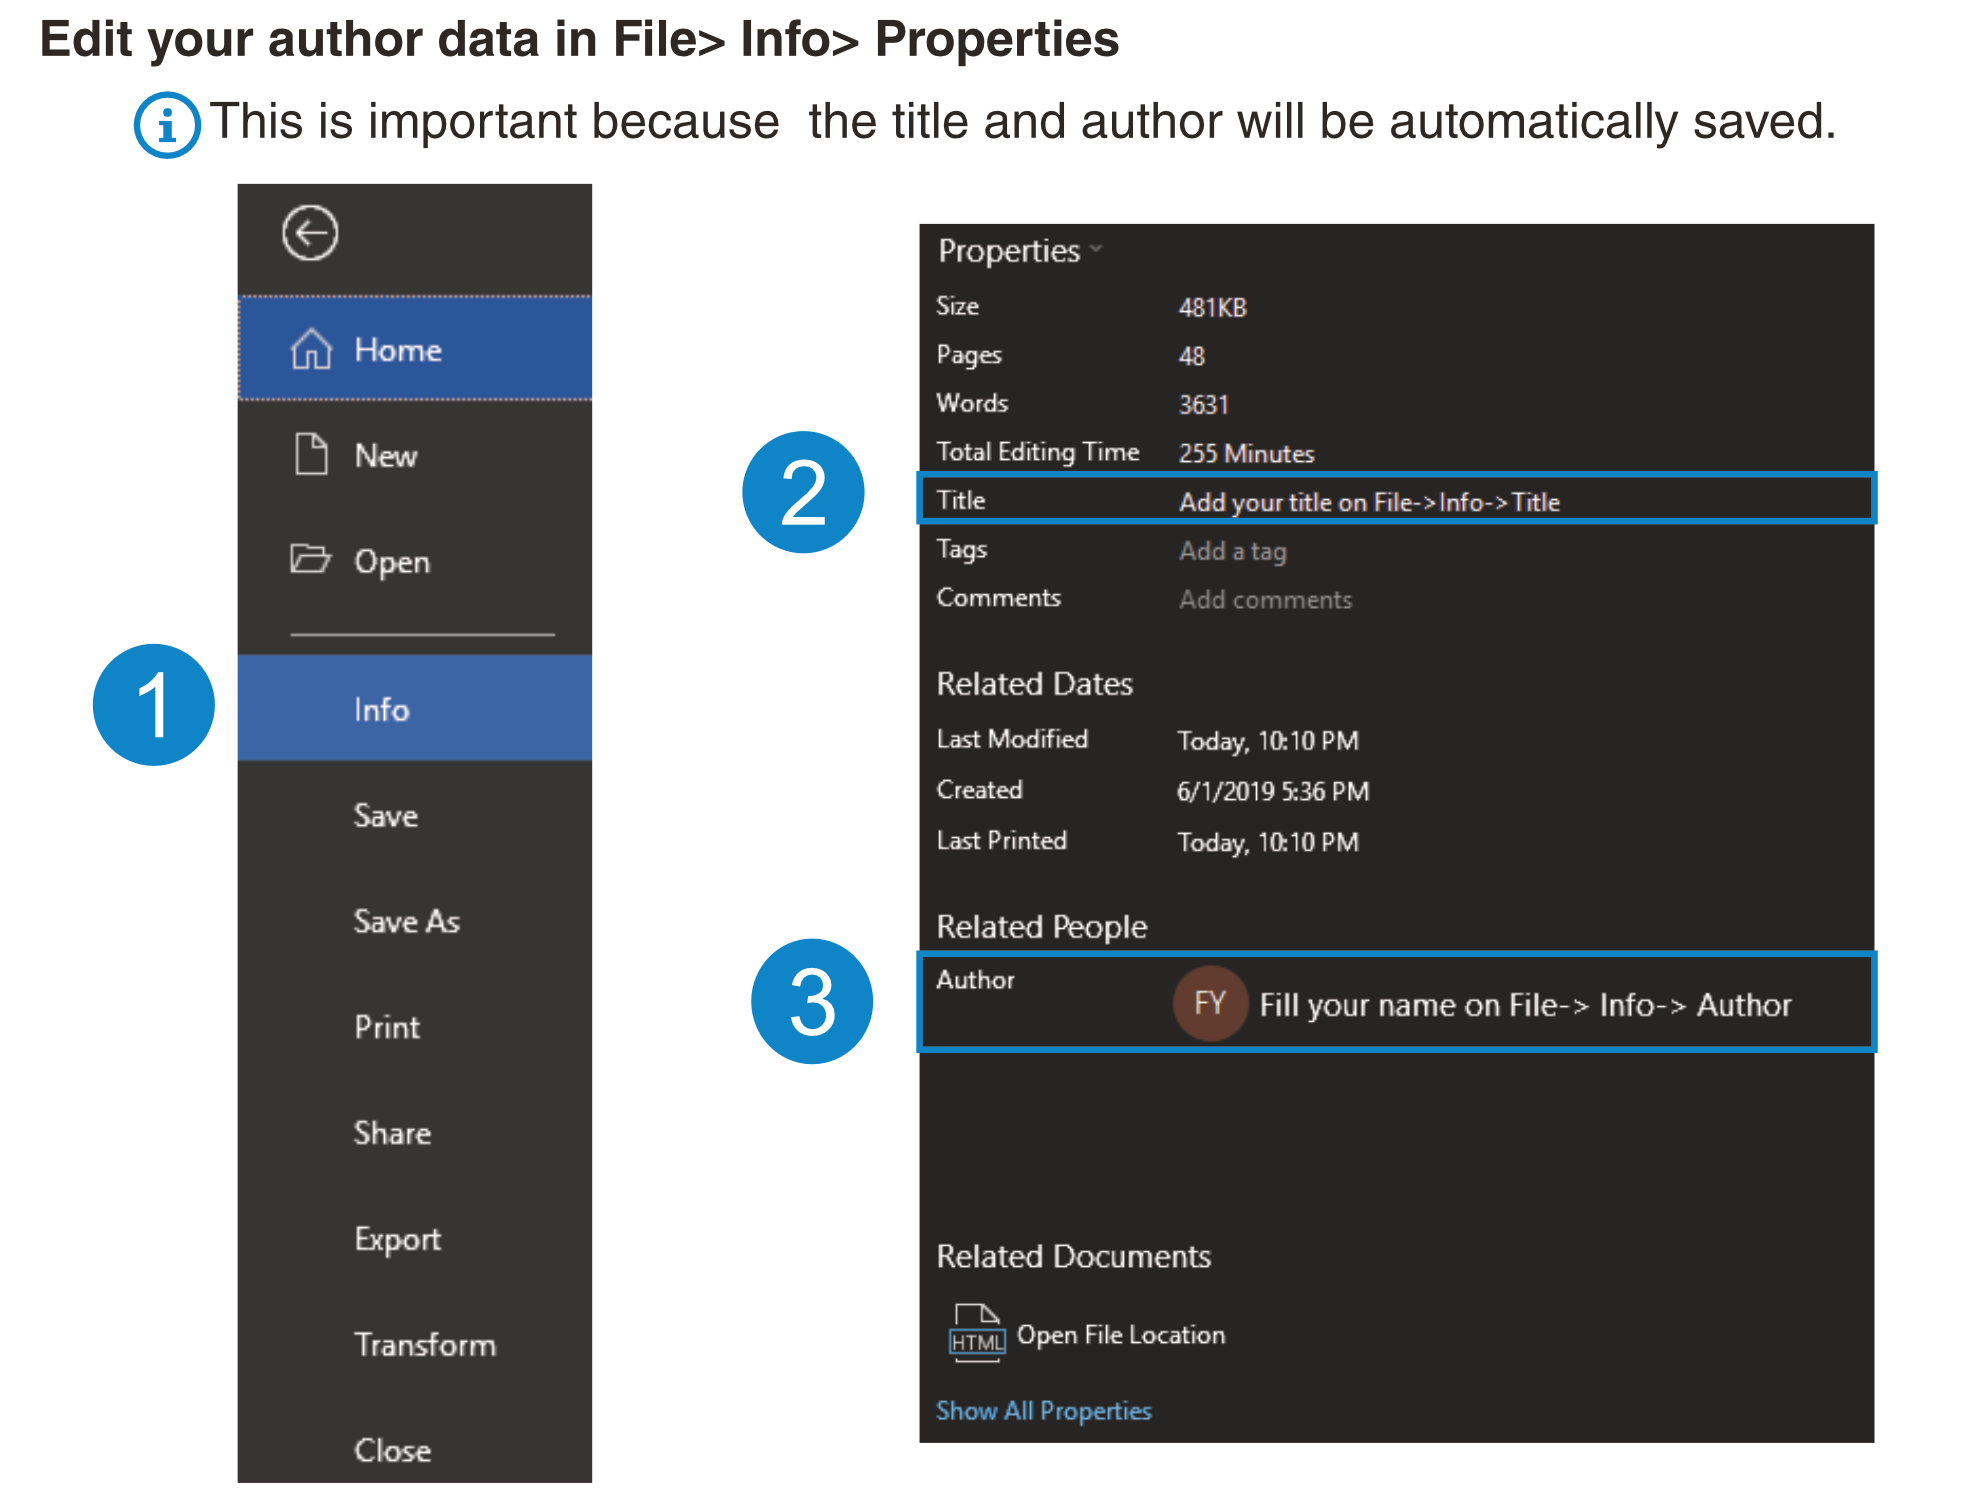
The template makes use of fields, which allows you to just add information to the document through Home > Info such as: author, title, and tags (keywords); see below:
 Fig.1 MS Word: how to set up fields
Apply styles
Next learn about Styles, which is the way that MS Word deals with different text formating. If the any text has a style applied the advantage is that you can easily change the font and its size, and automatically it is applied to the whole document. Thus, ☝ avoid changing the font (or any other formatting here and there) by selecting a portion of the text: these changes will not be propagated throughout the document; unless you need to do so. Advice, use a font that will be supported by the printer (fonts already available in MS Word should be a safe bet).
How to use the Styles (Home > Styles) in your document:
- Normal for body text
- Headings for headings (up to 3 levels its not recommended more)
- this is important since it allows to build automatic the index automatically
- Caption
Where to find the styles:
 Fig.2 MS Word: where to find Styles
With all this setup, you are ready to write. However, here are some more tips that could be useful before you began to write.
Best way to deal with
- Abbreviations
- can be easily made by creating a table, and place the content as you go. When you finish just sort and change the table line to white
- Tables preferentially use academic styled tables
- position of the captions: above
- don’t use tables as images
- thick horizontal lines in the header and line at the bottom, see the example:
 Fig.3 Example of a table using academic style
- Figures
- position of the captions: below
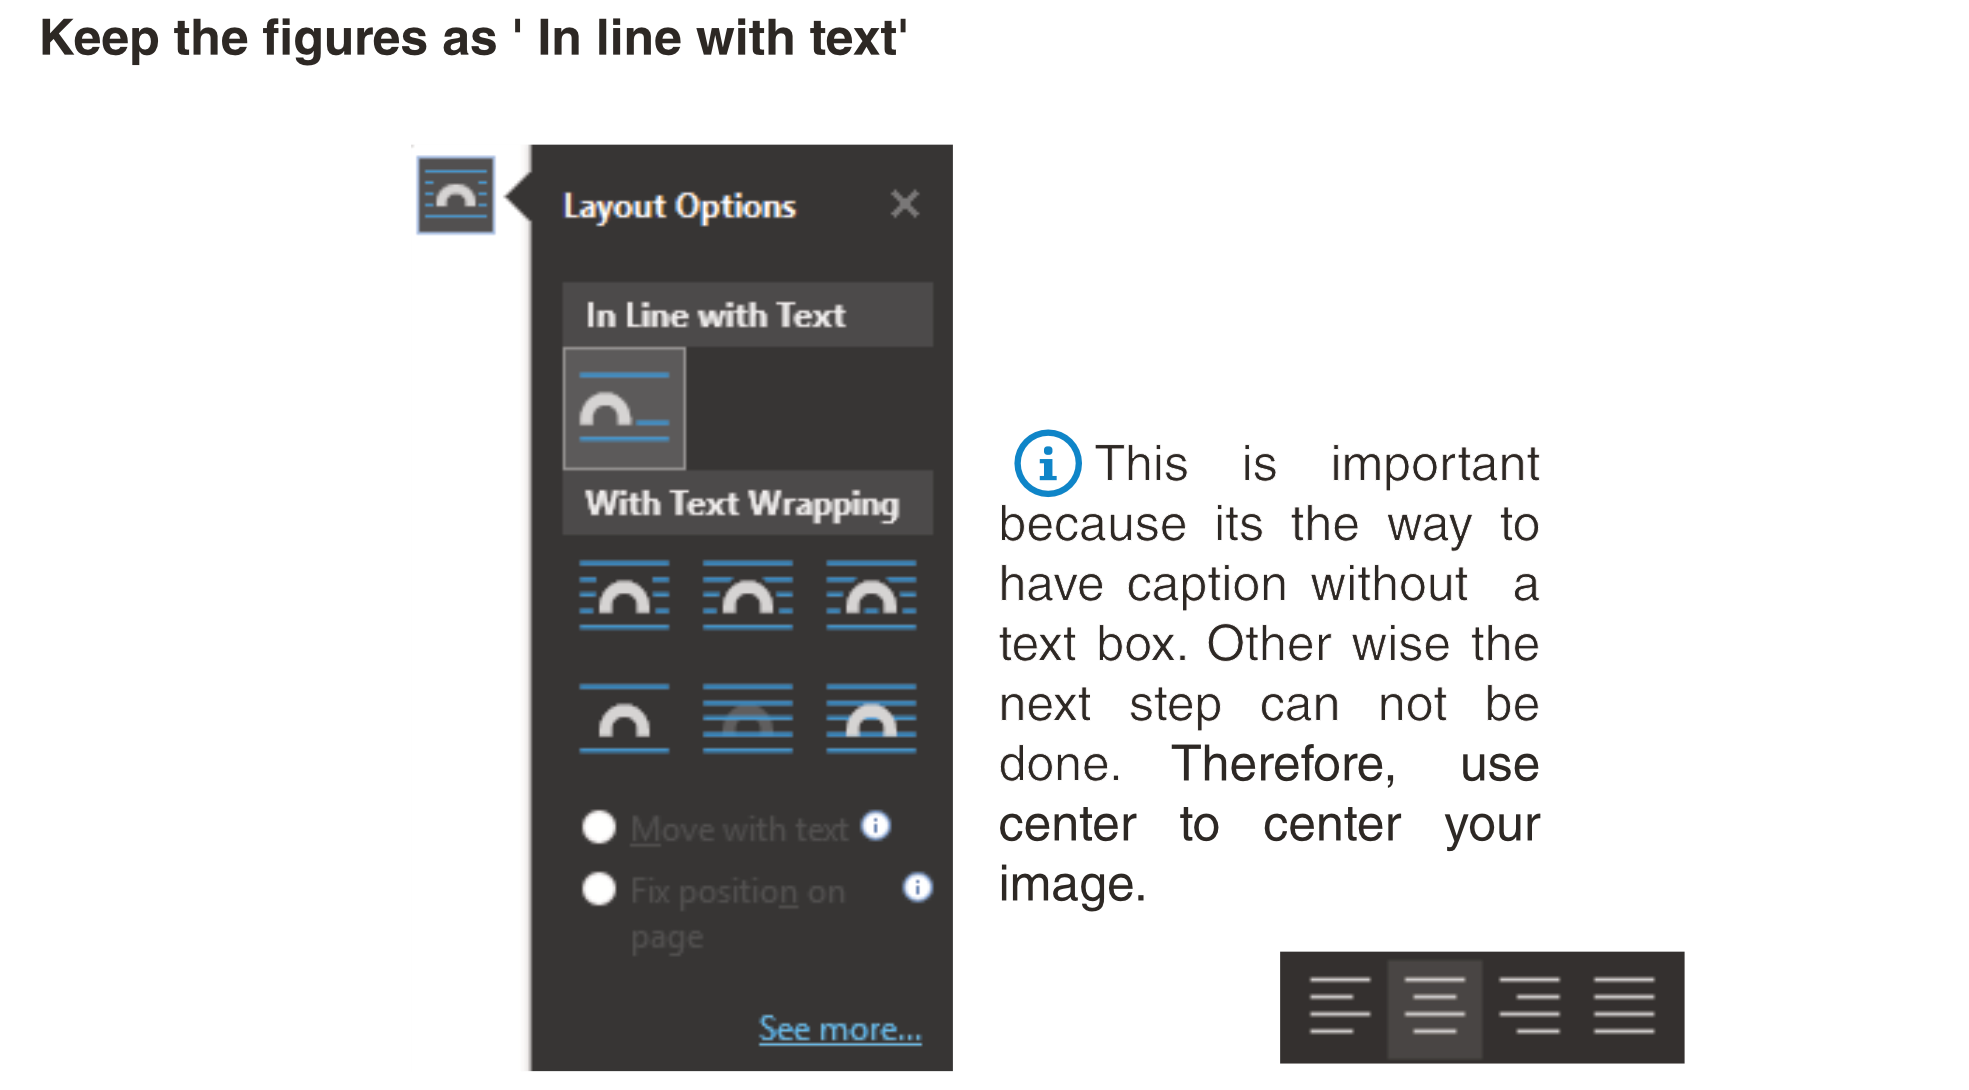
- treat them as
inline with text, this allows the images to flow with text, thus avoiding frustration of images not being in the correct (or expected) place; see below: - see more about preparing figures here
 Fig.4 How to change layout options of figures
Now, while you are writing keep attention to page breaks, because they are keepting the document formating secured.
Keep attention to
- Page and section breaks
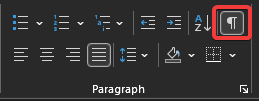
- to see where the page breaks are go to
Home > Paragraph > Show all
- to see where the page breaks are go to
 Fig.5 How to enable viewing page breaks and other advanced formating settings
- section breaks keeps allows different header and footer layouts (which includes the page numbering)
 Fig.6 How to identify section of page breaks
Hope it helps. 🙋♂️
Troubleshooting
- faulty fields, strange characters, etc…: select, and press Alt+F9
- e.g. this is when some caption are not well numbered and and error occurs
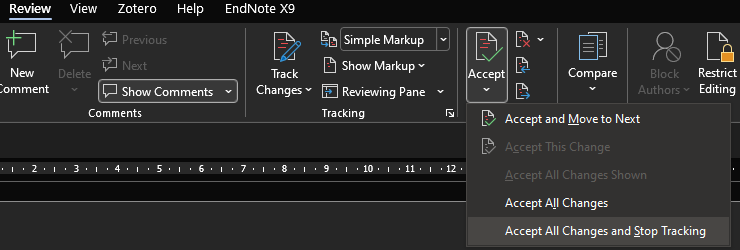
- EndNote not placing citations: disable tracking changes
Review > Changes > Accept all change and stop tracking- if you agree with the change of course
